Microphotography
Historical document, translated for reference. It reflects medical knowledge of the 1920s–30s and is not medical advice.
Summary
This article from the 1928–1936 Great Medical Encyclopedia details the techniques, equipment, and optical setups used in microphotography for scientific and medical research.
Encyclopedia article (1928–1936)
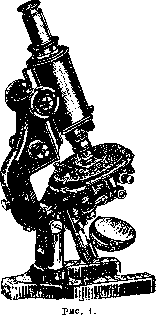
MICROPHOTOGRAPHY, the production by means of photography of images of microscopic objects that are usually observed subjectively through a microscope eyepiece. The main advantages of microphotography—its accuracy and objectivity, the comparative speed and ease of obtaining images, as well as the ability to reveal details through the application of special methods that escape subjective observation—are the reason for the extraordinarily wide distribution of this method in all fields of knowledge without exception where the microscope method is applied. Microphotographic apparatus. In principle, a microphotographic apparatus is a camera whose optical system, instead of a conventional lens, is a microscope. Therefore, given the latter, anyone can assemble a homemade microphotographic apparatus. The main part—the microscope—can be of any design and quality, provided there is a movable and light-tight connection between it and the camera. Many companies also design special "microphotographic" stands, supplying them with the finest mechanical parts and highest quality optics. (Figure 1 depicts the latest model of this type by Carl Zeiss.) Such a microphotographic stand strikes one with its "wide body tube"; it must be said, however, that this wide tube is strictly necessary only for microphotography with the smallest magnifications (up to 30 times and less).
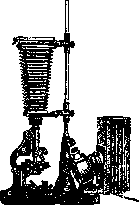
Vertical Zeiss camera. magnifications (up to 30 times and less).-Microphotographic setups from various manufacturers differ quite significantly. They can be divided into three groups: small (usually for plates of
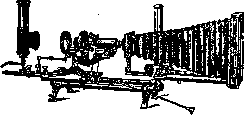
Fig. 3.
size 9x12; Figures 2 and 3), medium (13x18 and 18x24; Figures 4 and 5), and large (24x30; Figure 6). For the majority of work, 9x12 setups are entirely sufficient. Usually, they are adapted only for photography with a vertically positioned microscope, which in no way harms the work. For more meticulous work, one deserves
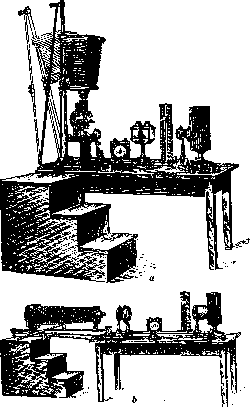
Figure 4. Zeiss 18x24 camera: a—in vertical, b—in horizontal position.
undoubted preference for large-sized cameras, with the possibility of both vertical and horizontal positioning, equipped with an "optical bench." Large models are necessary only for the most delicate investigations. Of particular value in them is (Figure 6) the independent arrangement of the microscope with illumination devices and the camera itself on two separate supports. In this way, the transmission of vibrations from the illumination part to the camera is eliminated, which is almost unavoidable in other setups and extremely undesirable in precise work with high magnifications. To avoid the influence of vibrations, some large microphotographic setups can be equipped with suspension springs upon special request. The large model, given its long two-part bellows, possesses a very large extension, which is sometimes also quite essential. The newest, extremely diverse models of microphotographic setups from various firms are currently equipped with a whole series of improvements that facilitate and speed up work. Large Zeiss setups, at a higher cost, fulfill the fundamental requirements of geometric optics more completely than others. In what follows, such a model will be considered predominantly as the most perfected.
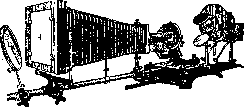
Figure 5. Reichert 13x18 universal apparatus.
A special position is occupied by special eyepiece-microcameras released relatively recently by Zeiss, and subsequently by Leitz and Reichert, which are mounted directly onto the microscope body tube. All these extremely practical and convenient models possess the further completely exceptional advantage of allowing the observation of the object during the photography itself. Thanks to the presence of instantaneous shutters, such cameras can be used to take instantaneous photographs of moving objects even with sufficiently intensive illumination (Figure 7). Basic prerequisites in microphotography. Obtaining good-quality microphotographs, especially at high magnifications, depends largely on eliminating any vibrations during exposure; therefore, it is recommended to use a separate room for microphotographic work, preferably on the ground floor; during exposure, carefully avoid any jolts, movement of people in the room, etc. It is very advisable to conduct the work in a dimly lit room and absolutely necessary to eliminate any extraneous light falling directly onto the specimen and microscope. All lenses must be in a state of absolute cleanliness. The presence of dust causes light diffraction and harms the image. One should carefully avoid intensive cleaning and rubbing of the lenses. Best of all, once they are carefully cleaned with chamois or a soft old linen cloth, one should most carefully avoid any future contact of fingers with the glass. Dust should be brushed off with a soft, wide brush. Almost every micro-photography has its specific features, and therefore familiarity with the theoretical foundations of image formation and the ability to handle individual cases is very essential for the operator.
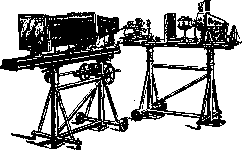
Figure 6. Large Zeiss camera.
Illumination. When embarking on microphotography, attention is first paid to the correct relative positioning of the microscope and the camera: both parts must be set strictly on a single optical axis and securely fastened. Next arises the question of illumination—the main factor upon which all final results depend. The illumination of the specimen must be strong and uniform, and for this purpose, apart from the Abbe illuminator (condenser) available in the microscope, one has to resort to the help of various auxiliary lenses, as well as take care in the correct choice of the light source itself. Diffused daylight or direct sunlight is almost never used for microphotography due to a number of difficulties. From the theory of microphotography, artificial light sources are required to have the greatest possible intensity, a sufficiently large luminous surface, and the greatest possible uniformity of its incandescence at all points. Any light source can be used to one degree or another, and if one neglects the first requirement, a good kerosene lamp with a flat wick may prove quite suitable. However, it is clear that the conveniences of electric lighting are so great that nowadays the latter is used almost exclusively. As is well known, the electric arc (of direct current) ranks first in terms of intensity (after direct sunlight), and this circumstance compels its use precisely in those cases of microphotography where this intensity is of overriding importance. However, using the electric arc has a number of inconveniences, and in most cases, people strive to replace it with other sources. For example, 'pointolite lamps' (Punktlampen) are very perfect. However, they are short-lived, require very skillful and careful handling, and are expensive. Ordinary incandescent lamps, including half-watt ones, are of little use due to the elongation of their incandescent filament. They are successfully replaced by so-called projection incandescent lamps with a special filament arrangement, and even better by low-voltage lamps with a thick incandescent filament. Since such lamps are also quite expensive, it is strongly recommended to turn them on through a corresponding regulating rheostat, using their full incandescence only at the very moment of exposure. In this way, their service life can be increased 5-6 times. Whatever the light source may be, a special biconvex lens, the so-called collector equipped with an iris diaphragm, is absolutely necessary for its use. This is brought about by two reasons: firstly, the luminous surface of all the described sources is still insufficient in its area, and secondly, for proper use, it should have been placed in the immediate vicinity of the microscope condenser, which is obviously impossible. By casting an enlarged image of the luminous surface into the plane of the Abbe illuminator diaphragm with the collector, both of these difficulties are eliminated. The collector is located near the light source on an optical bench (a massive metal rod). Along the optical bench, on a special stand—a rider—the collector can be moved closer to and further from the light source and fixed in any place. Other auxiliary lenses are installed in the same way, as well as special vessels with plane-parallel glass walls (Fig. 6 and others). Setting the light source at some distance from the microscope is also important because this significantly weakens the harmful effect of excessive heat rays on the specimen and the microscope itself. It is often necessary to go even further and install 'heat filters' on the optical bench, i.e., the above-mentioned vessels with plane-parallel glass walls, filling them with water or, better, a solution of Mohr's salt, potassium alum, or ammonium-iron alum. The same cuvettes, filled with solutions of coloring substances, also serve as light filters (see below). A. Köhler established a very important proposition, according to which the specimen will be illuminated most strongly and evenly if all optical systems are set up so that the collector diaphragm is projected as well as possible in the plane of the specimen. This proposition is fulfilled, in turn, under the condition that the light source is projected as well as possible in the plane of the illuminator diaphragm. Thus, a rule is formulated that helps resolve
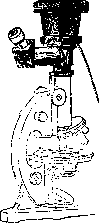
Figure 7. Etica ocular-camera "Foku".
one of the most important preparatory tasks—the correct illumination of the specimen. According to this, the primary task of the operator is to 'center' the light source relative to the correctly fixed microscope. When working with a vertically standing microscope, the microscope mirror is covered with a sheet of paper and, using the available devices, the light source is moved up and down, right and left, until it occupies the correct position; by moving the collector, the light source is projected, at least approximately, onto the mirror. Next, by moving the mirror, the beam is cast onto the illuminator diaphragm. It is advisable to temporarily place a piece of gray paper in the plane of the diaphragm and obtain the clearest possible image on it by moving the collector. Further minor corrections are achieved by moving the mirror. In horizontal photography, the microscope mirror is removed, and focusing is performed in the same order directly onto the diaphragm (or onto paper). It is very essential that the image fills the entire diaphragm as much as possible without going beyond its limits. In his setups, Zeiss introduces a special lens Z70 onto the bench, which has a device for movement to the right, left, up, and down, facilitating the final fine adjustment (Fig. 8). The beam of light cast onto the plane of the condenser diaphragm, having been refracted in its lenses, subsequently enters the objective and eyepiece of the microscope. The Abbe condenser plays an extraordinarily large role in image formation during subjective observation, which is usually underestimated by the majority of practical microscopists; during projection, its significance becomes decisive. The Abbe illuminator is essentially an inverted microscope objective with a focal length of about 10-12 mm. As indicated above, its task in this case is to project the sharpest possible image of the collector diaphragm in the plane of the specimen. Unfortunately, ordinary microscope illuminators not corrected for spherical and chromatic aberration are unable to fully resolve this task. Therefore, in microphotography, it is highly desirable to use more perfect (and expensive) illuminators: aplanatic or, even better, achromatic (Fig. 9). Weak microscope objectives can be used as an illuminator, using a special mount for this purpose. With very high precision of the achromatic illuminator device or when working with an objective, a particularly precise alignment of these parts along the optical axis of the microscope is required, which is achieved by a special device. To obtain good microphotographs, it is very important to fully master the conden
FZ10 Dx D1 Figure 8. a—light source; K—collector; Dx—its diaphragm; f—cuvettes for filters; D1—condenser diaphragm; M—microscope stage.
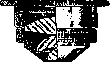

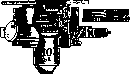
Figure 9. a—aplanatic condenser n.a. 1.4; b—achromatic condenser n.a. 1.0; c—centering mount for using weak objectives as an illuminator.
the microscope and learn to properly use the diaphragm of the apparatus. If we place any preparation on the microscope stage, having previously sufficiently narrowed the diaphragm of the condenser, we will not see the expected image of it on the preparation - for this it is necessary to move the entire illuminator (condenser) somewhat back. Having thus established the image, one should again correct the projection of the image of the light source onto the condenser diaphragm by moving the condenser or the centering lens. If now, opening the condenser diaphragm, we observe the strongly illuminated preparation, we will notice that narrowing the mentioned diaphragm begins to limit the illuminated part of the preparation, but has almost no effect on the brightness of the illumination. On this basis, the condenser diaphragm can be called the field diaphragm (Figure 8, Dt). Its use has its important significance for the quality of photograms, and here one can establish a firm and invariable rule: the field diaphragm should never be opened wider than the limits of the preparation directly subject to photographing. The excess light falling on the preparation is of no use whatever in photography; on the contrary, by creating unnecessary reflections, it greatly affects the clarity of the negative. Let us now turn to the study of the action of the condenser diaphragm. Let us equip the microscope with an objective and an eyepiece for subjective observation; in order not to harm the eyes from very strong light, it is necessary to reduce the incandescence of the lamp with a rheostat or otherwise weaken the illumination (for example, by placing a thin paper somewhere in the path of the beam). Narrowing the condenser diaphragm, we notice that it no longer has any effect on changing the size of the illuminated field, but on the contrary, moving it strongly affects the intensity of light and the character of the image: the intensity of illumination decreases, while the sharpness, clarity, and depth of the picture increase. If, greatly narrowing the diaphragm and removing the eyepiece, we look at the rear lens of the objective, we will see only a small bright circle in its center; if we begin to open the illuminator diaphragm, the bright circle will expand; in other words, we see that the diaphragm of a properly set condenser directly controls the effective aperture of the objective - its aperture; therefore this diaphragm is called the aperture diaphragm (Figure 8, D3). Gradual opening of the diaphragm expands the pupil of the objective to its full aperture, determined by the frame of the glasses. In most cases, the condenser diaphragm at this moment will be far from fully open. Naturally, further opening of it can no longer have any effect on the objective. The moment when the diaphragm aperture 'coincides' with the full aperture of the objective shows that now the apertures of the illuminator and objective are equal; with further increase, the condenser aperture becomes larger than the objective aperture; in the opposite case - smaller. The condenser aperture has decisive importance for the character and properties of the image; however, here it is extremely difficult to give any precise guiding instructions - the size of the diaphragm is determined by the peculiarities of the preparation and the desire of the photographer to give the microphotogram one or another character. From what has been stated above, however, it is clear that the use of a condenser aperture larger than that of the objective is quite impractical; on the other hand, theory and practice show that reducing the aperture beyond a certain limit causes diffraction phenomena and also harms the image. Some practitioners of M. recommend photographing at 2/3 of the objective aperture. It is still more correct to be guided by the properties of the preparation. Objectives. When working in M., one should undoubtedly give preference to apochromats. However, achromatic lenses when using light filters are also quite suitable. It should also be noted that in microphotography it is incomparably more advantageous for changing objectives to use not a revolver, but a saddle-like device that allows for more precise centering. In choosing the number of the objective, one is generally guided by the following basic rule: use stronger numbers for higher magnifications, and not resort to strong eyepieces or excessive stretching of the bellows. However, one should remember that increasing the power of the objective is associated with a decrease in its depth, which is extremely disadvantageous for microphotography. Therefore, sometimes it turns out to be very useful to photograph with smaller numbers and subsequently make enlargements from the negative. It is also sometimes very useful to use side illumination. Eyepieces. The eyepieces commonly used in microscopy, compensating and Huygens, are little suitable for M. 1) They are designed for subjective use and cannot, with normal adjustment, give a projection onto a ground glass. For this it is necessary either to slightly extend the upper lens of the eyepiece (the more so the closer the ground glass is located) or to move the entire microscope tube slightly with a micrometer screw; the first is troublesome and inconvenient, the second disrupts the correctness of lens calculations and harms the image. 2) The mentioned eyepieces give significant curvature of the field of view. In subjective observation, little attention is paid to this, since continuous work with the screw corrects the unevenness, but in M. this defect ruins the work, since we will constantly have on the photograph either a sharply centered center and unclear edges or vice versa. A long time ago Zeiss proposed special projection eyepieces, which fully resolve the first difficulty, but do not correct the convexity of the field. At present, both defects have been eliminated by recently issued Zeiss eyepieces for M., so-called homals. There are 3 numbers of them, all of the same magnification, but different for objectives of different focal lengths. Homals belong to the type of compensating eyepieces, i.e., they are suitable for apochromats (and strong achromats) and only in stands with wide tubes. They are quite unsuitable for subjective observation. It should however be noted that many firms at present produce eyepieces for subjective observation with significantly corrected field curvature. Such 'plan-eyepieces' of Reichert, periplanatic Leitz eyepieces, etc., are naturally more convenient also for microphotography. Light filters. The absolute necessity of using light filters in M. is based on the following. 1) The photographic plate 'sees' objects not as our eye does. Figure 10 shows a diagram of the spectrum of all greatest
greatest brightness for
brightness of the eye
600 550
400 red, orange, yellow, green, blue, cyan, violet. Figure 10: of the rays perceived by the eye, wherein the yellow part of the spectrum with a wavelength from 530 to 620 mu is the most active on the retina of our eye, i. e., the most "bright". A separate table (to the article Neurofibromatosis, Figure 2) shows a photograph of the spectrum on an ordinary plate; here the greatest brightness lies between 425 and 480 mu. Consequently, the plate transmits light yellow tones as dark, and dark blue as light. 2) Ordinary non-achromatic objectives, rendering an image of a colorless preparation, actually produce several color images of it located close to each other, but not merging in a single plane. By making an exact focusing with the eye on the preparation and guided by the yellow rays best perceived by us, we still will not obtain an exact focusing for the plate, which is more strongly perceptive of blue and violet images. 3) In microphotography, one usually has to deal with microscopic preparations specially stained in various colors to distinguish various parts; in this case, it can easily happen that the plate will be unable to detect contrasts that are sharp for the eye. When using light filters, the use of orthochromatic plates is mandatory, i. e., plates that, like the eye, brightly "see" yellow colors. [Figure 1 (see the separate table to the article Neurofibromatosis) depicts the spectrum captured on such a plate.] Sometimes panchromatic plates are used, i. e., sensitive to almost all colors. Light filters are various transparent colored media that let through some colors of the spectrum and absorb others. Liquid light filters are used, most often aqueous solutions of various coloring substances poured into the above-mentioned cuvettes (Figures 6 and 8), as well as solid massively colored glasses, glasses with a layer of colored gelatin or collodion applied to their surface, gelatin or collodion films. In all cases, such light filters are inserted somewhere along the path of the light beam incident on the preparation. Flawless light filters for all cases are manufactured by the Lifa light filter factory in Augsburg (Bavaria). In the presence of dyes, light filters, especially liquid ones, can easily be manufactured independently; solid ones are more difficult to prepare. By inserting the necessary light filters into the illumination system, the above-mentioned difficulties are eliminated, and achromatic objectives, for which they are absolutely mandatory, are equated to apochromats; however, even with the latter, light filters are still inevitable in many cases. The main task of light filters is most often the attenuation of the excessive action of blue and violet rays, and sometimes the complete exclusion of certain colors. When working with stained preparations, by a skillful selection of light filters, many details of the preparation can be sharply highlighted (see the separate table to the article Neurofibromatosis, Figs. 3 and 4). Each light filter is characterized by the complete absorption of known colors of the spectrum or at least their partial attenuation. It is clear that out of the total amount of light energy carried by a complex white light beam, a certain part, sometimes very significant, is retained in the light filter. By virtue of this, the use of light filters during shooting is inevitably associated with an elongation of the exposure time, sometimes by two to three times, and sometimes by hundreds of times. For any light filter, by means of special measurements, its absorption spectrum can be determined, which gives a quite clear characteristic of a given light filter. The choice of a light filter for each individual case depends on the experience and knowledge of the operator (Figure 11). For the manufacture of homemade light filters, one needs a number of special organic dyes; in many cases, however, one can do without them, using the Zeiss green light filter.

Staining: Eosin, Bismarck Brown, Congo Red, Picrocarmine. Fuchsin, Methyl Violet ....... Heidenhain's Hematoxylin. Methyl Green ..... red. Methylene Blue ..... dark red.
Color of light filters: blue-green, dark green, a » b », », c », \ used only on panchromatic plates
Figure 11. Absorption spectra of a number of Lifa light filters for the most common stains of microscopic preparations. The hatched part of the spectrum is absorbed by the light filter; the remaining light part represents the rays acting on the plate. The letters at the top designate Fraunhofer lines; the numbers at the bottom designate the length of light waves (in mu). * (115 g of copper sulfate, 11.5 g of potassium dichromate per 1,000 parts of water).
It must be remembered that the focus setting must necessarily be performed with the light filter already turned on. Microphotography at various magnifications. The arrangement of devices described above is intended for work with a high-power objective, with an aperture of 0.6 and higher. Under these conditions, having set the preparation, it is necessary only to take care of the most accurate possible focusing of the image on the ground glass of the camera. Thorough correction for the thickness of the coverslip of objectives with corresponding mounts in microphotography is even more important than in microscopic observations. Here, they usually resort to the help of the so-called focusing magnifier (Fig. 12). For the finest work, instead of ground glass, a transparent glass is installed, on which the image can be captured only by the mentioned magnifier.
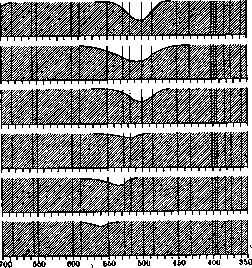
When working with lower-power objectives, the described setup of illumination and condenser is unsuitable. The illumination of the preparation in this case is obtained although bright, but covering only a very small portion of it in the center of the field of view. The approximation or removal of the condenser in microphotography usually practiced in such cases must by no means be allowed, as this fundamentally disrupts the entire principle indicated earlier. The correct measure is the removal of the upper lens of the condenser, and an illuminator with a smaller aperture and a longer focal length (36 mm) is obtained, providing illumination of a larger surface of the preparation. Simultaneously with this, in Zeiss devices, additional lenses are introduced: the so-called auxiliary lens Hoo is inserted into the collector, and instead of Z70, Z40 is installed (the number denotes the focal length), and the setup is checked according to the principle described earlier (Fig. 13).
At even lower magnifications (up to 30 and less), the changes in the setup are even more significant. Shots are produced no longer with ordinary objectives with microscope eyepieces, but with special systems used without eyepieces, the so-called...

Figure 12.
gg»,nbb F Z40 Figure 13. D3M with Zeiss planars and microtars, Leitz summaras, Reichert micro-polars, etc., of various numbers, with a focal length from 35 to 100 mm. In view of their large focal lengths and wide field of view, these objectives can be fully utilized only on stands with a wide body tube, with the upper and lower flanges being removed and the objectives attached to a special "funnel" screwed in place of the ocular flange of the body tube (Fig. 4). The illumination system also changes fundamentally: the focal length of the condenser, even when unscrewed, proves once again insufficient and it is removed altogether; instead, special lenses are introduced, the so-called "spectacle lenses" (Brillengläser) of various focal lengths, depending on the focus of the objective used. An auxiliary lens Hi00 is inserted into the collector and a new "collector" lens K20 is introduced, as well as an iris diaphragm D2, which now serves as the aperture diaphragm (Figure 14). Finally, when replacing the collector with two special large lenses and in the presence of a special support, as well as a conventional, good objective, this Zeiss setup can also serve for shots in natural size or with a magnification of 2-3 times (brain sections, transparencies, etc.). Guided by the schemes given above at various magnifications on the most perfect Zeiss setup with various additional lenses, the operator will be able, without special effort, to create possible optimal shooting conditions with more limited equipment or on other setups and even on a homemade apparatus, with the most primitive means at his disposal. It is easy to see that success in microphotography depends much more on the correct use of available opportunities—understanding the set goal, knowledge of the photographic process—than on the equipment itself. Microphotography in a dark field of view. The difficulties of obtaining microphotographs in a dark field of view boil down almost exclusively to the correct, strictly central setup of illumination. Shooting can be performed with any dark-field condenser. The most effective, but at the same time requiring F Z40 D2 Figure 14. Z20 D3M particularly careful setup, is, however, the cardioid condenser of Zeiss's latest release. In all cases, the use of an electric arc is required; with sufficient skill and a small camera extension, obtaining instantaneous exposures is also possible. Microphotography of opaque objects with incident light. The main difficulty when using even small magnifications consists in illuminating the object with light falling from above as steeply as possible (to avoid harsh shadows that could completely distort the appearance of the subject). Zeiss attempts to solve this problem in two ways. a) On special holders above the specimen, a thin round frosted glass is placed, illuminated from the side by a very strong beam of light, and a concave or flat mirror is installed on the other side; as a result, the object receives almost even illumination without shadows; neither glass should cover the objective (microplanar or other) (Fig. 15a). b) In the path between the objective and the object, a very thin, plane-parallel polished glass is installed at an angle of 45°, which does not impede the passage of rays from the object into the objective. From the side, a
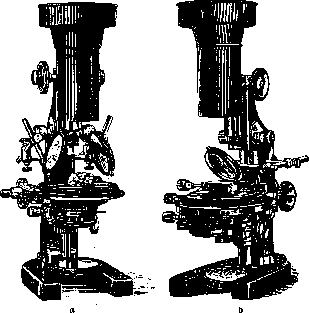
Figure 15.
strong beam of light is directed onto this glass, which (albeit with losses of up to 50%) illuminates the object from above. With this arrangement, work is possible at low magnifications with all special lenses of the planar type and others (Figure 15b). When using microscope objectives proper, even small ones, there is not enough space to arrange these illuminators in the required manner. However, there are special devices that make it possible to use even powerful objectives. These include, for example, the Nachet vertical illuminator (Figure 16), which has a special prism inside that reflects the light directed from the side onto the specimen. The prism half-closes the working aperture of the objective, i.e., reduces its aperture. Therefore, this illuminator is not suitable for powerful systems; in addition, it requires special shortened objectives and gives satisfactory results only when observed without a coverslip. Figure 17 depicts a vertical illuminator by Beck, where light is reflected from plane-parallel glass. This model can also be used with powerful objectives and in the presence of coverslips. Despite the fact that both systems optically have a number of significant shortcomings, sometimes they turn out to be very useful, especially
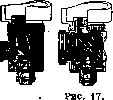
FIG. 16
but in metallurgy when photographing microstructures of alloys and the like. Microphotography in polarized light presupposes a knowledge of both the theory and practice of the polarizing microscope. The greatest difficulties are presented by shooting at low magnifications (planars, etc.). For its setups, Zeiss constructs special polarizers and analyzers that make it fully possible to resolve the corresponding tasks. Stereoscopic microphotography. In connection with the ever-greater spread of the binocular-stereoscopic method of microscopy, the significance of stereoscopic microphotography is also growing. Indeed, binocular microscopy and, even more so, stereoscopic microphotography very often provide the key to understanding the most complex and difficult pictures, especially in cytological research (chromosome counting, etc.). As is known, in a whole series of microscopic works, the "binocular microscope" with two objectives and eyepieces finds application with great success, giving average magnifications up to 200-400 times. In connection with this, mention should be made of the stereocamera long ago proposed by Dünner (Fig. 18). The disadvantage of this stereocamera in its original design was that microphotography was performed with the objectives alone without eyepieces, which is why the ultimate magnification was very insignificant (30–40 times) with a very small depth of focus due to the absence of an illuminator and diaphragm in the objectives. To eliminate the latter shortcoming, the use of homemade diaphragms on the objectives can be recommended; the first shortcoming in the absence of a camera bellows remains uneliminated. Only recently has Zeiss constructed a special attachment of two homal-type ocular systems, quadrupling the objective magnification (Figure 19). There is, however, another way of obtaining stereomicrophotographs using a conventional monocular microscope within the limits of all available magnifications. To obtain a three-dimensional image, it is necessary, as is known, to have two shots of the object taken at a certain angle from two different viewpoints, in full accordance with our right and left eyes viewing the subject differently. The required result can be achieved without special effort by two successive shots: 1) with parallel displacement of the camera (or only its objective) by a certain distance relative to the stationary object, or 2) with
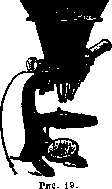
movement of the object (by a movable stage) with a stationary camera. These techniques ensure complete stereoscopic effect when shooting opaque objects with reflected light. With transmitted light, however, as is almost always the case in microscopy, such movement may prove insufficient. As indicated above, illumination by a condenser acquires paramount importance here; by shifting the illumination axes, one can fully achieve the necessary differences between the right and left shots. On this basis, in its newest microscope models, Zeiss equips the Abbe illuminator with more significant movement to the right and left, which is noted on a special millimeter scale. For older models, it offers a special "stereo-aperture for the condenser," making it possible to achieve the same effect (Fig. 20). Microphotography in short-wave rays. The theory of image formation establishes that the resolving power of a microscope, i.e., the ability to distinguish the finest details, is determined by two factors: 1) the magnitude of the objective aperture and 2) the wavelength of light in which observation is conducted; thus, an objective of a certain aperture makes it possible to distinguish more details of the object the shorter the light wave. The magnitude of the working aperture of the objective for glass lenses under the best conditions practically cannot exceed a value of 1.4. There remains, therefore, for the experimenter only one possibility to increase the resolving power of the microscope—to work in the shortest possible light waves. Since short waves correspond to darker colors of the spectrum, and the photographic plate "sees" them more brightly and perceives even the invisible ultraviolet part of the spectrum, the significance of microphotography becomes especially essential here. In practice, subjective

Figure 20.
observation cannot be carried out below the limits of the bluish-blue color of the spectrum, i.e., below 550 mμ. The use of the bluish glasses usually attached to microscopes is a fiction from the point of view of increasing resolving power, since they pass a whole conglomerate of different rays. On the contrary, in M. of colorless transparent objects with large structural details, one can indeed 'see' significantly more, but on the condition of using M. in monochromatic light, i.e., in a beam of rays as homogeneous as possible in length. This can be achieved: 1) by including appropriate light filters that pass only a narrow segment of blue color (but such filters will inevitably be very dark, completely unsuitable for subjective observation); 2) with the help of a special 'mercury lamp' for microscopy (Zeiss construction), which gives a discontinuous, linear spectrum; by attaching to such a lamp even a relatively weak transparent light
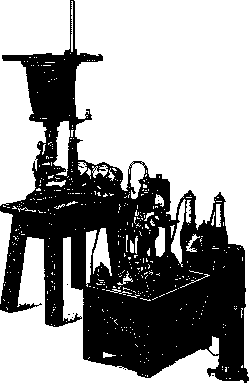
Figure 21.
filter, one can obtain an almost homogeneous beam; 3) by decomposing a complex beam with a spectroscope. When using instruments based on this principle, 'monochromators,' especially in combination with a linear light source, the best results are obtained. One can, however, go much further and take photographs already in the invisible rays of the ultraviolet part of the spectrum. According to the design of A. Köhler of Zeiss, a special type of microphotographic apparatus for ultraviolet rays was constructed (Fig. 21). The system consists: 1) of complex instruments for obtaining short-wave light rays (the light source is the flow of high-voltage electric sparks between cadmium or magnesium electrodes); 2) an optical bench on which are located a collector, a prism that decomposes the beam, and a prism that directs part of the spectrum into the condenser of the microscope; 3) the microscope and 4) the camera. All lenses, prisms, condensers, objectives, and eyepieces are made of quartz, not of glass, which is opaque to ultraviolet rays. Object slides and cover slips are also only quartz. Objectives, due to the necessity of constructing them from only a homogeneous material (quartz), are 'monochromats,' i.e., corrected for rays of only a specific wavelength. The object cannot be enclosed in Canadian balsam, so for this purpose water, paraffin oil, glycerin, etc., are used. Focusing is extremely difficult, as the invisible image is located by special 'finders.' Photographs of the structurally finest object—the shell of 'Pleurosiyma' algae—show the remarkable resolving power of the system. The wavelength at which the photographing is done here is 280 mμ. Color Microphotography. When it is necessary to obtain microphotography in the true colors of the object, one can use both autochrome and three-color methods (see Photography). The main condition for success here is the selection of filters corresponding to the light sources used, so that the difficult three-color method in itself becomes even more difficult in the context of microphotography; while the incomparably easier autochrome method is limited at high magnifications by the relatively large size of the colored starch grains in the emulsion layer of the corresponding plates. The quality of the negative material plays a very important role in microphotography. The first and most important requirement for the sensitive layer is its complete purity, as certain defects here can not only be unpleasant but also serve as a source of errors. From all that has been said above about the effect of various parts of the spectrum on the emulsion, it further follows that it is desirable, and sometimes necessary, to use ortho- or even panchromatic plates when working with multicolored objects. It is also extremely useful for the plates to be anti-halation. Halos, which are extremely harmful to image clarity, are particularly noticeable when there are large differences in illumination intensity in the object, which is often the case in microphotography. The danger of halation appearing drops almost to zero with films and special anti-halation plates, provided with a layer that absorbs actinic light between the emulsion and the glass (for example, Agfa Chromoisolar and Chromoisorapid plates), or on the back surface of the glass. If necessary and with skill, one can prepare plates of the latter category oneself, by applying to their back surface, for example, a solution of 50.0 aurine in 900.0 2% collodion with 100.0 warm strong alcohol and 4 cm3 castor oil or corresponding commercial preparations. The sublayers of the first category are bleached during 'normal plate processing'; if the same does not happen with those applied to the back surface, they either separate in water before development or have to be removed before printing. Plates of high sensitivity must be used in microphotography only for photographing rapidly moving objects, especially in dark-field illumination. In all other cases of using such plates in microphotography, they should be avoided. Most often in microphotography, work is done with emulsions of ordinary, medium sensitivity (70-90 on the Winn scale, 10-12 on the Scheiner scale). When it is possible to make longer exposures, working with low-sensitivity plates of the reproduction type can be extremely advantageous for obtaining the finest details and shades, as well as for obtaining particularly rich negatives. The same advantages are possessed by wet collodion plates at low cost, however, their use is extremely limited by the inconvenience that their emulsion retains sensitivity only for 2-3 minutes until it dries. These plates therefore have to be prepared immediately before use, and their preparation itself requires considerable skill and time. Finally, the emulsion should be as free as possible from 'chemical' fog, which is extremely unpleasant and harmful in microphotography in general. A test for the presence of fog can be made by immersing a part of an unexposed dry plate in the developer and keeping it there in complete darkness for as long as is usually required for this developer to produce a normal negative. In the complete absence of fog, after fixing there will be no difference between the developed and undeveloped parts; any darkening of the developed part will indicate the strength of the existing fog. On determining exposure. Determining the required duration of light action on the sensitive emulsion under given conditions to obtain a good microphotograph, i.e., determining exposure, is obviously also one of the most important conditions for success. This duration, as in ordinary photography, must be such that the darkening of various parts of the plate after development is proportional to the amounts of light received by them from the corresponding parts of the object. Beyond these limits of 'correct exposure,' the darkening of the plate parts will no longer correspond to the amounts of light reaching them, and the microphotograph will therefore not convey the density and color gradations inherent in the object. Most of the most important photochemical laws relating to this can be understood from consideration of the so-called characteristic curves of plate darkening. To construct such a curve, we will plot along the abscissa axis the logarithms of exposures E, equal to Jt, i.e., the products of light intensity by illumination time. Along the ordinate axis, we will plot the densities of darkening D, equal to the logarithm of the ratio of the intensity of light falling on the plate to the intensity of light transmitted by it, since here, as in other photochemical reactions, only the absorbed energy acts. By exposing parts of the plate at different values of E, we will see on the curve constructed in this way (Fig. 22) that with very small exposures, no darkening occurs at all (the corresponding values of E lie below the reaction threshold). Then the curve (middle, B), rising very gently, gives a concave section, which passes into a fairly long straight segment; further, the curve also gently bends in the opposite direction and begins to descend downward. A 'normal' exposure will correspond to the straight segment, in which obviously the darkening of the plate will be proportional to the products Jt; the initial concave segment corresponds to 'underexposure,' the upper sloping segment to 'overexposure,' and finally the descending part to the beginning of solarization, which can lead to obtaining a positive image instead of a negative. It should be borne in mind that numerically equal products J cause the same darkening only with small fluctuations in intensity and duration of light action; with larger shifts, the character of the curve can change significantly. In this case, a decrease in illumination intensity may require increasing the duration of light action in unexpected limits for us. The relationships conveyed by the curve will be reflected in the properties of the resulting negatives as follows. Below the reaction threshold (the distance of it from the ordinate axis characterizes the 'sensitivity' of the plate) we will not get any traces of the image; with extreme underexposures only faint traces of the most intensely illuminated parts of the object will be obtained, as here only they, and then only insignificantly, have passed the reaction threshold. Under normal conditions, these are completely useless photographs, completely dark, with barely indicated highlights of the brightest points. With lesser degrees of underexposure, the intensity of negative darkening in these most brightly illuminated points increases significantly and can reach great strength; meanwhile, only very limited categories of less brightly illuminated areas have time to cross the reaction threshold. As a result, we have extremely contrasty negatives (sharply black lights and transparent shadows) and prints with sharply white lights and extremely unsatisfactory detail rendering in all less brightly illuminated areas, which still print extremely dark. Next follows the straight part of the curve, corresponding to 'normal' exposure. The properties of the negatives and prints obtained here have already been described above.
This section has a certain duration and the angle at which the curve rises here may be different for different plates. Curve B, where angle a = 45°, refers to normal plates, whereas for rigid, contrast plates this angle is greater (curve A), and for soft plates it is significantly smaller (curve C). At the very beginning of the bend in the curve after the straight section, i.e., at the very beginning of overexposure, we get very dark, rich negatives in which details in the highlights begin to disappear, but the shadows are still sufficiently transparent. In the prints we also get contrasty pictures from them, but unlike the underexposure contrasts, the negatives here are generally dark, the prints are generally light, and the contrast is created only due to the disappearance, smoothing of details in the highlights. Moving up the sloping curve leads to greater and extreme degrees of overexposure, characterized already by a decrease in contrast: in fact, in the negatives the intensity of blackening in the highlights no longer only does not increase, but may even decrease (beginning of solarization); at the same time, less intensely illuminated areas manage to send to the corresponding areas of the plate such significant amounts of light that in them almost equally intense blackening is achieved. As a result, we get uniformly gray or black negatives that give pale, monochrome copies, devoid of any richness and details. Finally at the top of the curve we will have uniform blackening of the entire plate. Taking into account all the above about the significance of one or another shortcomings of negatives, one, by changing the exposure in the opposite direction, can select the required duration purely by experimental method on trial shots. With considerable skill this is usually achieved quite quickly, but even such experience cannot always save from the need to spend several plates. It is therefore better to give several different exposures on one plate at once, gradually pulling out the cassette cover each time by 1-2 cm and repeating the same exposure at the same time. Zeiss supplies its large installations with special cassettes making this operation more convenient. Special exposure meters represent exceptional conveniences for quick and accurate determination of exposure, supplied by Zeiss and Reichert with small cameras with side viewfinders (see above). The glass scale placed in front of the plate is divided into 7 sections. The extreme one, marked with the number 100, is completely transparent glass; the neighboring one, marked with the number 50, lets through only half the light. The following sections, marked with numbers 20, 10, 5, 2 and 1, are darkened successively so much that they let through only 1/5, 1/10, 1/20, 1/50, 1/100 of the light obtained with an uncovered plate under the given conditions. Let, placing the exposure meter in front of the plate, we gave for a trial an exposure of 10 sec. and, after developing, obtained the best result on the strip marked 5. We therefore need to reduce our trial exposure 20 times or take 5% of it, which will be 1/2 sec. Using the device, one can therefore obtain the required answer, allowing even in a trial an overexposure up to 100 times; beginners learn relatively soon not to exceed this limit or not to exceed it often despite the fact that in M. with a very large number of moments that can influence the duration of exposure, the latter can vary correspondingly in very wide limits—from hundredths of a second to many minutes. In M. a very large number of factors are interested in the duration of exposure, moreover only partially subject to exact preliminary accounting. Exposure of course depends on the strength and actinic power of the light source, on how well its energy is utilized with the help of intermediate collectors; on the transparency of the filter and the object of photography (thickness, color, color and thickness of the layer of balsam or other medium, thickness and color of the slide and cover glasses); on the focal length of the microscope condenser (inverse proportionality); on the magnification (inverse proportionality to the square); on the aperture of the objective and condenser (direct proportionality) and of course on the sensitivity of the plates. A number of factors subject to preliminary accounting are combined by Köhler into formulas, according to which one, having a good M. made from a given object on a given installation, can obtain by calculation the same photograph from the same object on the same installation and under any other conditions. However, the calculations here are so complex that the same author proposed and built by Zeiss a special logarithmic slide rule for performing them, the use of which with perfect optical equipment represents considerable conveniences. Practically most often one has to make elementary calculations, changing the extension of the camera (direct proportionality to the square of the distance from the rear lens of the objective to the plate) and the size of the diaphragm of the microscope condenser (inverse proportionality to the square of its diameter). Developers and development. For developing microphotographs, of course, all usual developers and rules of development are applicable and one can get perfect photographs using any ready-made developer. However, if one does not want to miss the advantages associated with rational development, one should keep in mind the following. 1) The organic developing substances used almost exclusively at present break down into two main groups: fast ones (metol, amidol, rodinal, pyrocatechin) and slow ones (glycin, hydroquinone, eikonogen, diogen), working 2-3 times slower than the former. Increasing the concentration of such basic substances in the developer causes greater contrast of the negative, lowering leads to the opposite. 2) An essential component of any developer is sodium sulfite (sodium sulfite), making easily oxidizable solutions of developing substances more durable and dissolving silver bromide; it is needed for different developing substances in somewhat different amounts given by recipes; one should not vary its quantity without changing the concentration of the basic substance. In significant excess it causes extremely undesirable coarsening of the grain of the negative. 3) With the exception of amidol, all other organic developers require alkalization of the working solution. The increase in alkalinity produced at the beginning of development accelerates the course of the process and reduces the contrast of the negative; however, by adding alkali at the very end of development, one can cause the opposite result. Decrease in alkalinity leads to an increase in contrast. The choice of the alkali itself is also not indifferent—carbonate alkalis give the most delicate and rich in fine nuances negatives, whereas caustic ones work coarser and sharper; here yellow blood salt is the most energetic. 4) Often a certain amount of potassium bromide is already introduced into the recipe, without which however one can do; slowing down development, it contributes to an increase in contrast and purity of the highlights of the negative. Among slow developers glycin enjoys well-deserved popularity due to its ability to be applied to more significant errors of exposure, and among fast ones—the combination of metol with hydroquinone due to the special brilliance and richness of the negatives it gives. In order to be able to best use all the above influences of changing concentrations, it is best to use recipes where the basic developing substance with sulfite is separated from the alkali; e.g.: A) Dist. water - 1,000.0; sodium sulfite - 100.0; glycin - 20.0 (it is useful to slightly heat when dissolving). B) Dist. water - 500.0; potash - 100.0. Usually for use one takes 2 parts A, 1 part B and 2 parts water. When one wants to soften contrasts (with underexposure), one takes A - 1 part, B - 1 part, water - 4 parts. To increase contrasts one can take A - 3 parts, B - 1 part, water - 1 part or to work without water at all. One can add a few drops of 10% solution of potassium bromide. Or, when one wants to use hydroquinone-metol, one takes such a recipe: A) Dist. water - 1,000.0; metol - 5.0; sodium sulfite - 100.0; hydroquinone - 7.0; potassium bromide - 2.5. B) Dist. water - 500.0; potash - 100.0. For use usually one takes A - 3 parts, B - 1 part, water - 2 parts. All the same changes in the composition of the working bath are possible as with glycin. In overexpositions one adds drop by drop 10% solution of potassium bromide in addition to its content in the main solution. There are several methods of development. The simplest of them is development by time, in which, without watching the course of development, one keeps the plate in the developer for the optimal time for this developer (e.g. 4-5 min. for hydroquinone-metol and 9-10 min. for glycin). This method must be strongly recommended when using the exposure meter described above; it should also be used when using panchromatic and especially sensitive plates, since such development can be carried out quite without control under any light.
This method can also be highly recommended for beginners, since uniform development, without correcting exposure defects, allows even a beginner to clearly understand the relationship between error and result. The complete opposite of this blind method is the development method in three trays, which aims to correct all exposure defects. There is no doubt that it can and actually does provide significant help in this regard. Trays are prepared in advance with normal, slow but relatively concentrated developer, and finally with fast but significantly diluted developer. Development begins in the second tray; if the image appears within the normal time for this developer, development is finished in the first bath. If the appearance of the image is delayed, the negative is transferred to the third tray, but if it develops insufficiently intensely there, it is returned to the second. Finally, if development proceeds faster than normal, it should be carried to completion in the second tray and for a sufficiently long time, without being alarmed by intense blackening: with overdevelopment, one can hope to obtain a satisfactory print only from a strongly developed negative, which can then be improved by subsequent processing (see below). A short overdevelopment is in any case completely useless. Fixing of microphotographs does not differ in any way; an acid fixer should almost always be recommended for fixing, for example: water-1000.0; sodium hyposulfite-250.0; sodium acid sulfite (bisulfite)-20.0. In hot weather, formulas with alum are useful, for example such: dissolve 30.0 sodium sulfite in 100.0 water; 2 cm3 of pure sulfuric acid in 50.0 water; 260.0 sodium hyposulfite in 700.0 water and mix in the order given. Correcting negatives. With some skill, a significant number of negatives that do not give satisfactory copies can be substantially corrected by subsequent processing. Negatives rich in detail and clean, free from fog, but weak and insufficiently dense, can be intensified, for example, with mercuric chloride. Thoroughly washed negatives are bleached in a solution: 500.0 distilled water, 10.0 mercuric chloride and 10.0 potassium bromide. After good washing, blackening in a 10% aqueous solution of sodium sulfite and again washing. In these cases, many other intensifiers can be successfully applied; to particularly weak but absolutely fog-free negatives, the use of a particularly powerful copper intensifier can be recommended (a plate of medium strength will be completely ruined by such significant intensification). Before use, mix in equal parts solutions of 12.0 potassium bromide in 500.0 distilled water and 12.0 copper sulfate in the same amount of water. In such a bath, bleaching occurs, as in the mercuric chloride solution. Water washing should last only 4 minutes, after which the negative is blackened in a 10% aqueous solution of lunar caustic; thorough washing. Negatives that are excessively strong, dense, dark, or fogged can be significantly improved by reduction. The most popular is Farmer's reducer, consisting of a 10% solution of sodium hyposulfite and a solution of the same strength of potassium ferricyanide (store in yellow glass or in the dark), mixed directly before use in various proportions depending on the desired nature of the reducer's action. If one takes 8-10 cm3 of potassium ferricyanide solution per 100 cm3 of sodium hyposulfite solution, the reduction will proceed (control by light, convenient to work in transparent trays) not too quickly and will affect both the strong and weak parts of the negative equally. Such a bath composition is good when one does not want to significantly change the character of the negative, therefore it is best suited for reducing only overdeveloped normal negatives. Where it is desirable to increase contrast with overdevelopment and in the presence of fog, it is better to take more potassium ferricyanide, up to 15-17 cm3 per 100 cm3 of sodium hyposulfite solution. The process in such a bath proceeds incomparably faster and, according to the observations of most authors, such a bath acts earlier and more strongly on the weak parts, which causes an increase in contrast and elimination of fog. After reduction-energetic and thorough washing. Even greater defects can be corrected by combining the two procedures just described, for example in negatives with strong fog and low contrast due to significant overdevelopment, when reduction carried out to the necessary degree in terms of removing fog and eliminating weakness makes the negative too weak, unable to give a sufficiently rich print. Both operations must be separated by thorough washing. A quite special place and significance belongs in microphotography among the numerous intensification methods to the Favorsky method, capable of detecting differences in shades and coefficients of refraction completely indistinguishable to the eye. Such a possibility is especially important in vivo studies of cellular and in particular nuclear structures, which often cannot be directly observed at all. The essence of the method consists in the possibility, if necessary, of being repeated an unlimited number of times, of building up pigments on extremely underdeveloped (therefore very contrasty) but almost invisible without additional processing negatives from special pigment paper or bromo-silver emulsion with non-tanned bromide. Unfortunately, the method is complex, requires great skill and perfect negative material. The positive process in microphotography does not differ in any essential features. One can only note that here papers and methods related to absorption of details cannot find application; on the contrary, in microphotography glossy aristotype, bromide, chloro-bromide, and chloro-silver papers are popular, capable of the most perfect transmission of all details of the negative. Handling 'daylight', printing with a visible image aristotype paper is extremely simple and is described in the instructions accompanying the packages. Exposing, developing, and fixing 'night' bromide and chloro-bromide papers is very similar to the corresponding processing of plates. When copying negatives on 'daylight' papers in diffused light, the worker can influence the character of the print only to a very small degree, obtaining darker prints with longer exposure and lighter prints with shorter exposure of the same character. Only copying in direct sunlight can significantly reduce contrast (which is hardly ever advantageous in microphotography). Recalling all that has been said above about the importance of exposure in the negative process, we will immediately appreciate the possibilities associated with the use of 'night' papers with development. By varying exposures and selecting softer or harder-working varieties, we have the opportunity to significantly influence the character of the print in the desired direction. The development of all three groups of papers belonging here does not differ in anything essentially important; however, each of them may require significant differences in the composition of the developing bath. Bromo-silver papers are developed with the same developers as plates, diluting them half with water. The most favored here are hydroquinone-metol and amidol developers (before use add to 100 cm3 of 5% sulfite solution 0.5 amidol). Chloro- and chloro-bromo-silver papers are treated with more concentrated developers, the recipes of which, well matched to this variety, are usually given in the instructions accompanying the packages. It is also important to have the possibility to reduce and intensify prints of 'night' papers, similar to what was described for negatives. For reduction, the same Farmer's recipe can be used, diluting it with two parts of water or adding to a 10% solution of sodium hyposulfite only a few drops of a strong solution of potassium ferricyanide. If one wishes to obtain particularly rich copies, one can deliberately overprint them slightly and subject them to short reduction by the method just described. Prints can be intensified with the summing intensifier mentioned above. A number of other methods are also applicable. Besides 'contact' printing in a frame on bromide paper, one can copy by projecting the negative onto the paper through enlarging apparatus. Among the latter, the most widespread are primitive 'cones' working with daylight, as well as models of ordinary projection lanterns where the light source is well hidden and does not disturb the complete darkness of the laboratory, which in this case serves as a cassette for bromide paper, fastened with buttons in front of the lantern after focusing on some white screen. It is extremely convenient to use for these purposes large microphotographic installations, arranged here as described above for photographs at minimal magnifications. The negative is secured directly in front of the large collector, and the paper is placed in the camera cassette (if necessary between glass and cardboard). It is of course necessary that the negative and its projection on ground glass be illuminated completely evenly.
This can be achieved more easily by placing frosted glass, tracing paper, or cigarette paper somewhere between the light source and the condenser. In addition to making valuable details that are often hidden in good negatives perceptible to the eye at various degrees of magnification (it is useful to study them with a magnifying glass), this method, by allowing the worker to manipulate the lens diaphragm, also provides new opportunities to influence the contrast of the copy: significant diaphragming can act here similarly to intensification. Yellow filters of varying density will have the same effect, which can be introduced here as well as when contact printing on bromide papers.
Related articles
Mentioned in
Cite this page
“Microphotography.” Soviet Medical Encyclopedia. English translation of Bolshaya Meditsinskaya Entsiklopediya, 1st ed. (Moscow, 1928–1936), ed. N. A. Semashko. https://sovietmedicalencyclopedia.com/article/microphotography/